pekny prispevok elmara,len by som uz ocenil,aby sa ukazky separacie a diskriminacie robili s cielmi zakopanymi a nie volne leziacimi na povrchu.Je v tom podstatny rozdiel...inak 1.
Metal Detector Minelab E-Trac - Six Month Test by Treasure Hunter
Categories: Minelab E-Trac metal detector
First taste of the detector
Minelab I've been walking the Explorer for a few years, so I was basically hoping that the E-Trac test would be that much easier for me. In the beginning, it really seemed to me that this would be the case. As time went on, however, I increasingly discovered a number of options in the audio setup, and things got considerably more complicated. After a month or so, I realized that E-Trac was simply a different detector than Explorer and started from scratch. Somehow the old tricks from Explorer didn't work :).
Detector design
 The design of the detector is based on all previous Explorer series. I would only say that by making the axis structure even more right-angled, the weight of the detector was better distributed. Thus, while the E-Trac is not the lightest detector, it can be used for a full day of searching without too much trouble. Like the Explorer SE, the professional uses a new type of 11" probe. This is very reminiscent of the probes made by Coiltek, who may have once made the first probes for the Minelab. But I'll get to that further down.The bottom line is that the probe is lighter and the mounting of the guide rod in the middle of the detector coil really suits the detector. The only downside to the design is the probe cap, which does not cover the entire bottom of the probe and it is very easy for dirt and sand to get into the cap. Although it looks very impressive, it is not very useful. Everything else suits me, the plastics are high quality, as is the carbon fiber bottom. Just a very high standard that we are used to with Minelab flagships.
Detector control box and LCD display
In this paragraph I apologise straight away to anyone who has never used the Minelab Explorer. It's hard to resist comparing the two detectors and for searchers who use the SE, this will certainly be interesting.
 |
 |
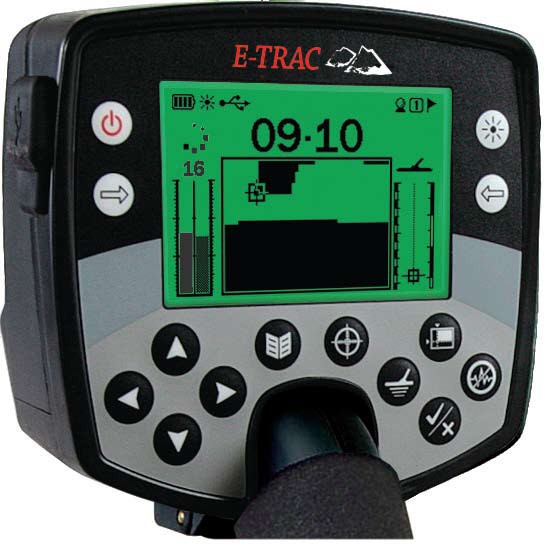
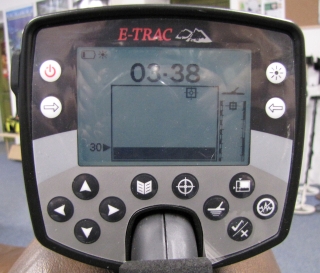
 The changes in the button layout are obvious and I think it's mostly a matter of habit. The same is true for the display of values in the two-dimensional chart, which now doesn't work from left to right as SEchers were used to (iron on the left, color on the right). Many searchers may find it interesting that they can also discriminate foils with IRON MASK. For me, however, this is irrelevant, as I basically always dig all colors. The foil evaluation is very hilarious with E-Trak, by the way, and basically for most such targets the cursor is all the way to the left. The numerical values of the targets are now displayed above the two-dimensional graph, or you can toggle this option. In that case, you have a small graph at the top and large digits in the middle.
The E-track box also has sharper edges, which is only a cosmetic change. However, the entire detector menu has undergone a fairly major change. Compared to the SE, I find it more logical and clearer. The E-Trac also basically brings together all the technologies and features Minelab has ever put into the Explorer series. But it has added faster evaluation and recovery. Overall, I consider the changes to be a definite plus and a step forward, and I think there's basically nothing to fault.
Audio settings
The audio detector has undergone a very interesting transformation compared to the SE. This will help a lot of searchers, used to a simple detector response, considerably especially at the beginning and gives them a better chance to get comfortable with the detector quickly. To work best in different locations, the audio setup, along with the type of location, and the amount of trash in the area where you are looking, is a critical thing. So in the first video you will find here, we will try to unravel the ins and outs of the setup and show at least a few tricks that can always be used to achieve maximum results in different locations.
In the first video you will find:
Detector settings in audio modes, the difference in the separation properties of the different modes and the detector response in Minelab multitone and in the 4 tone option.
Discrimination settings
For the detector, the discrimination settings can be made in both the Smartfind screen and the Iron mask. The two options are separate so you can switch between them as needed. The actual selection of the discrimination pattern can be done by the factory preset option, or by using the cursor. Tweaks such as automatic rejection or acceptance of the target can make setting up the discrimination easier. But the important thing is that you can choose from three cursor sizes, with the smallest size excluding only 1 ID number.
 |
In general, I think the factory preset patterns are just to test the device. My own settings are completely different, even at the cost of listening to a larger number of unwanted targets (foil, scrap metal). But if you want to dig for small silver coins, for example, the factory settings are definitely to be avoided out of the arch.
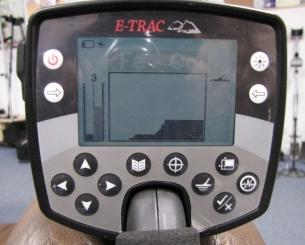
The photos show my own settings in Smartfind and Iron mask. Most of the time I'm looking at the Smartfind screen with this preset pattern (fig1). When in doubt over the target, I switch between the pure Iron mask field and the discriminating pattern in Smartfind. The Iron Mask setup (Figure 2) is more of a demonstration of how to get started very quickly and successfully. I think setting the iron to 30 is perfectly adequate and certainly more interesting to our circumstances than the preset patterns.
 |
 |
Discrimination, separation, conductivity, ferrous and finding iron with E-trace
All of these elements have a lot in common so I have tried to combine them into one paragraph. Obviously this won't cover all the settings, I just hope to give an example of how to work with the detector to make it really no1 :).
As most searchers know, too much discrimination affects the separation properties of the detector. To explain it to everyone, the best possible separation in detectors means differentiating between two objects lying side by side. The higher you set the discrimination filter on the detector, the worse the separation of the instrument. This is true in most cases, of course there are some instruments where it doesn't matter. What I will try to describe is the relationship of the different audio mode settings and the discrimination settings to the range and separation properties of the detector.
In general, one might say that it would be best to look in All metal (in the case of E-Trac, pure Iron Mask mode). However, since you have the option to choose between Ferrous, Conductivity and 4 audio mode settings on the detector, it won't be that simple :).
Detector settings answer Ferrous: In this mode the detector answers according to the relative amount of FE in the object. The higher the amount, the lower the tonal response of the detector, both in tone and multitone. A detector set up like this is very usable both with and without discrimination. In the tone option, irons report with a clear deep tone and coloured targets with high tones. Thus, if there is not too much garbage in the area, the grumbling of the irons can be tolerated quite well. The moment you get to a location where there is one iron target after another, the search can become very tedious. I think that in a really iron-infested location, you can only last a couple of hours at most in All Metal, and I'm convinced that the results will be worse than with any reasonable discrimination pattern. So for longer searches it's better to use some level of discrimination. You certainly shouldn't overdo the discrimination in the circumstances here. My own setup filters out only unambiguous iron targets (see photo fig1).
Detector Response Conductivity setting: in this mode the detector response depends on the surface conductivity of the object under the probe. For a searcher used to a grumpy iron response, the first encounter with this mode may seem a bit strange. Large iron objects, which also have significant surface conductivity due to their surface area, report a high pitched tone. Thus, I must definitely recommend working in multitone in this mode. You have a much better feel for the subtle differences between tones, which are very nicely modulated and an experienced finder is able to discern incredible detail in them. The discrimination setting in this mode is, at least for me, a definite benefit. Filtering out the iron will give you a much quieter search, unless you are concentrating on finding iron artifacts.
Iron search with E-Trac
On some sites you may have read on occasion about the Explorer series detectors not being very suitable for iron detecting. To some extent this was true, and tracking down a tiny handcuff could often become an ordeal. I have my own experience of tracking down small iron fragments and it was sometimes a pain :). E-Trac in the conductivity setting has improved greatly in this respect. When I write significantly, I mean that the detector's response is clear and accurate. The target announces itself in a high pitched tone and especially in the four tone mode it is a very pleasant response. Many searchers go in conductivity even when searching for classic "colored" targets. Here they proceed by having the small iron objects de-discriminated and the larger ones already listened to. For me, however, the tonal response, where iron is reported in a high tone and "good want targets" in a medium or even low tone, is still rather exotic. Basically, though, it's more of a habit.
Sensitivity settings, range and how the automatic behaves
 The relationship between sensitivity setting and range is logical, and E-trac is no exception. So it would seem that one could just write "the higher your sensitivity setting, the greater the range of the detector". Unfortunately, or perhaps fortunately, this is not the case in many cases.
If you test an object the size of a compote lid in a clean area, you will probably conclude that a more juiced detector means the greatest range. You'll be able to dig the target out from seventy centimetres and you can walk away happily. But since the vast majority of searchers enjoy targets that are smaller and have lower surface conductivity.I'm going to try to approximate the pitfalls of setting up an object like a small silver rattle can.
The setup will vary from site to site, and you should always start by tuning the most stable operating channel on the detector using Noise Cancel.
Slightly mineralized site with no ferrous waste: in this case, the detector can be tuned to maximum. All audio modes can be used without problems and I would choose the non-discrimination setting. In the expert menu, set the Deep mode to On and turn off the faster signal processing mode.
Medium mineralized site with lots of iron targets: you could also write a field behind the village where manure has been dumped for 300 years :). Discrimination settings the same as in the photo, or the quick way in Iron Mask. I think the number 30 is quite sufficient. In audio it will depend on what you are able to endure. Lovers of the calmest possible progression can opt for a normal in two tones. Those trying to capture every difference in response will of course add to the richness of the audio.
A high degree of mineralization - in general: This is where perhaps the power of the technology used by Minelab is most evident. Even in places that are renowned for having ferromagnetic rocks, you are constantly able to keep the instrument in a perfectly balanced state with no ringing. Adjusting the sensitivity according to the recommended value (right column on the screen) works quite well. Even if in such locations no detectors achieve miraculous ranges, E-trac still maintains a very decent level. Choose the settings according to local conditions, but select the soil type as problematic and I would also avoid the Deep On setting. In the case of large amounts of iron, set the detector for a faster response. But unless you get an iron target on every swing of the probe, leave this mode off as well.
Separation ... separation ..... separation
For many prospectors constantly testing the "recovery" speed of their detectors, in many cases the thing is absolutely crucial. For others, simply an indicator of how close an iron and a colored target can be :).
At the end of the test I focused on this problem. In all other aspects E-trac convinced me enough about its qualities. What I was trying to achieve was a setup in which I could get the color as close to the iron target as possible and hear it repeatedly. A sample of such tests can be found in the video below this paragraph. But I can only recommend to every E-track owner not to be afraid to experiment and not to take my recommended settings as an unchangeable constant.
As you will see in the video, not every Audio mode behaves the same way and the discrimination setting has a big influence on the most readable response. I myself arrived at several settings where I was able to identify targets that were significantly different in size, even though they were lying almost next to each other.
So basically I arrived at two modifiable settings for best separation. In this way I use the detector in places with a lot of iron targets. I will describe the settings for "normal locations" below.
Settings: Audio Normal, Multitone, Variability and limit to maximum, discrimination by photo1, ground and sensitivity by location (usually manual 22 to 28, ground Neutral). Deep Off, Fast On, Gain 24 (headphones) 30 without headphones.
2. Audio Smooth, 4 tones, Variability and limit to maximum, photo1 discrimination, ground and sensitivity by location (usually manual 22 to 28, ground Neutral). Deep Off, Fast On, Gain 24 (headphones) 30 mode without headphones.
Common locations
For normal searches without any focus on location, E-Trac is a very nice partner and you, as the searcher, can choose pretty much any setting. Since we have done a number of depth tests with the detector, it's safe to say that from a setting of about 22-23 sensitivity, the range doesn't move up much. It is basically impractical in places where the ground does not allow the detector to be pushed up unnecessarily.
Thus, if I wanted to relax, I set the detector to normal in Audio and calmly selected a two-tone response. I basically guarantee that you won't pass a single coin this way unless it's lying somewhere near the iron. But in doing so, you'll get a simple and uncomplicated answer.
It's definitely a good idea to use Multitone mode and learn how to use it. I spent a few days trying to arrive at some better settings for variability and limits than both at max. However, all the other options ended up being inferior and so I can only recommend that if Multitone then as rich as possible.
My two custom settings for roaming the landscape:
1. Audio Normal, 2 tones, discrimination - clear Iron Mask screen or set to about 30 (see picture 2). Mostly these are places without any extreme waste or iron load so I choose Deep on On and Fast on Off. Sensitivity to the level where the detector starts to go into lock up. Most of the time, though, I try to be at 22.
2. Audio Normal, Multitone, discrimination as shown in Figure 1. Deep on On and Fast on Off and sensitivity in auto set to +3.
Conclusion
 What to say in conclusion. I enjoyed my search with the detector, even though I was always a little bit scared by the prospect of some sort of evaluation test, given all the features and settings. You can see that the engineers at Minelab have done a great job with the detector and it is a top-notch device in terms of construction and materials. I would definitely recommend not letting any one setting impose itself on you, experiment, test and try as much as possible. This is the only way to get the most out of your detector and E-trac will give you the chance to adapt to the best possible situation in the place where you are looking.
Even a complete beginner can handle the detector, although some previous experience might be useful. In general, however, I would say that the device is best suited for a more experienced searcher who is looking for the most versatile detector with maximum range and accuracy of evaluation on the LCD.
Good luck Elmar
The article is included in categories:


